Import Custom VMs to Proxmox VE
This section will walk you through importing your custom VMs from VMWare ESXi to Proxmox VE.
Note
In this example, the PVE server is host22. The ESXi host we are transferring VMs from is host10. You will connect directly to the ESXi host, NOT the vCenter Server.
Warning
You should import all Custom VMs to your Management Server ONLY! Distribution to the host servers comes from the management server.
Prepare ESXi VMs
See Convert Custom VMs from VMWare to Proxmox VE before importing to Proxmox VE.
There can be no snapshots on the VMs being imported. You can make a full clone of the VM and import the full clone if you want to keep snapshots on your VMware virtual machine.
Make sure the virtual machine is on local fast storage before importing to Proxmox VE.
Setup ESXi datastore
Using your navigation panels, in the Resource Tree, navigate to Datacenter. In the Content Panel, select Storage.
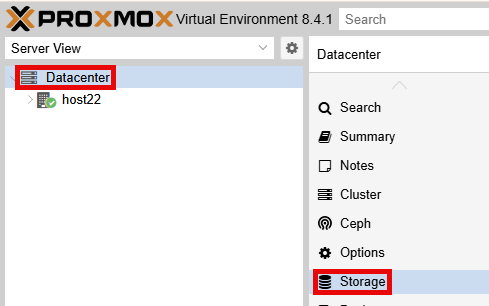
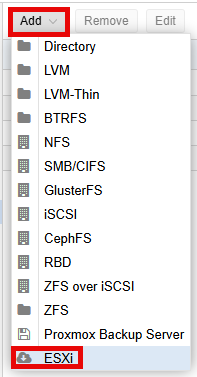
Click the Add > ESXi.
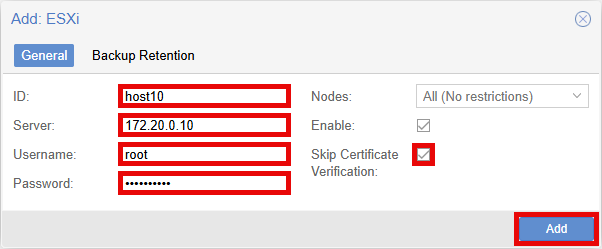
In the Add: ESXi popup window, enter an ID in the ID field. This is temporary while importing VMs and will be removed when completed.
Enter the IP Address of your ESXi host server in the Server field.
Enter your username of your ESXi host server in the Username field.
Enter your password of your ESXi host server in the Password field.
Click the checkbox for the Skip Certificate Verification field.
Confirm the settings are correct and click the Add button.
To confirm connectivity, using your navigation panels, in the Resource Tree, navigate to Datacenter > host10. In the Content Panel, select Virtual Guests.
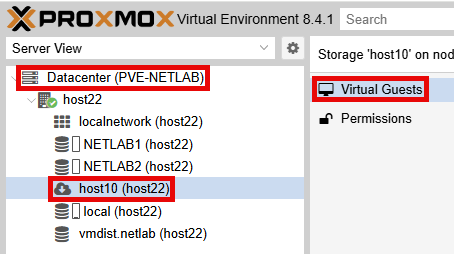
Confirm the VM(s) you plan to import are listed before continuing.
Import VM
In the Virtual Guests pane, select the VM you wish to import.
Click the Import button.
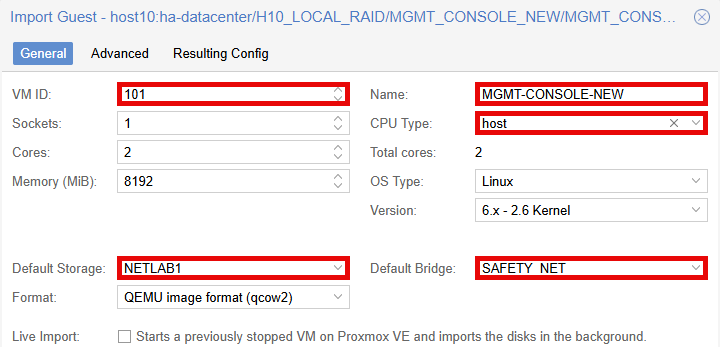
In the Import Guest popup, enter a unique ID in the VM ID field.
Adjust the Name field. (Some characters are not valid in Proxmox VE and are automatically omitted)
Set the CPU Type field to host.
Confirm the Default Storage field is set to NETLAB1.
Set the Default Bridge field to SAFETY_NET.
Click on the Advanced tab.
Set the SCSI Controller field to VirtIO SCSI single.
For each Network Interface, set the Model field to VirtIO (paravirtualized).
Confirm the settings are correct and click the Import button.

Depending on the size of the VM and the network speed, this may take several minutes.
Post Import Settings
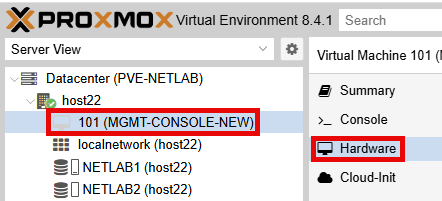
Using your navigation panels, in the Resource Tree, navigate to Datacenter > your_server > your_imported_vm. In the Content Panel, select Hardware.
GUI VMs
Confirm the Processors has a minimum of 2 cores. If not, increase by clicking on Processors > Edit button and adjust.
Click on Display > Edit button.
In the Edit: Display popup window, set Graphic card field to SPICE.
Enter 32 in the Memory (MiB) field.
Click on the Advanced checkbox.
Set the Clipboard field to VNC.
Click the OK button.

Modify Disks
Click on Hard Disk (scsi0) > Edit button.
In the Edit: Hard Disk (scsi0) popup window, click the checkbox for Discard and IO thread.
Click the OK button.
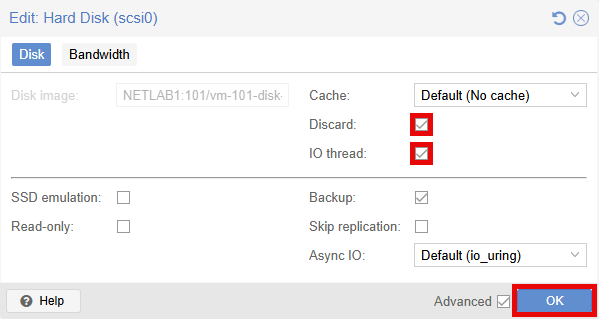
Repeat these steps for each disk on the VM.
Set Options
In the Content Panel, select Options.
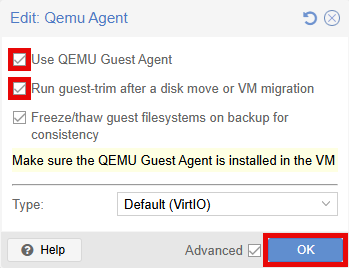
Click on QEMU Guest Agent > Edit button and adjust.
In the Edit: Qemu Agent popup window, click the checkbox for Use QEMU Guest Agent.
Click the checkbox for Run guest-trim after a disk move or VM migration.
Click the OK button.
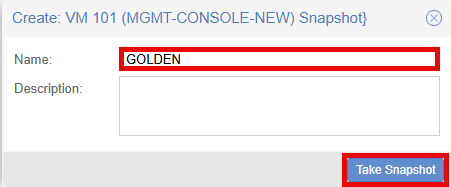
Take Initial Snapshot
In the Content Panel, select Snapshots.
Click the Take Snapshot button.
Enter GOLDEN in the Name field.
Click the Take Snapshot button.
When the Task viewer popup shows TASK OK you can close the window.